HTML, Hyper-Text Markup Language, is the foundation of any web page. Any language is an agreed upon standard of symbols in a set format to convey meaning. The World Wide Web Consortium maintains the standards for HTML, CSS, and other web communication technologies. In short, HTML is a standardized way of defining the contents of a web page.
There are only two things we need before starting: a text editor to create a web page and a web browser to view it. A good free text editor is Notepad++. A popular browser is Google Chrome. I will be using both of these tools for our tour, but feel free to use your own favorite tools.
Notepad++: You can download the proper version for your device at the Download page. Just run the setup program accepting all the defaults.
Chrome: Click "Download Chrome" on the Download page to automatically download and install.
This tour will show code examples. These examples have a caption like: Code 1 with some descriptive text and a file name in parentheses. You can copy the examples from this web page and paste into a new file in your text editor, type the same code yourself into your text editor as it appears in the examples, or copy the indicated files in the captions from My Code Examples Code Repository. Feel free to use any method. It is important for the file name to have a html extension. So, make sure your file name ends in html. Go to your folder containing the html file and double-click the file. The file should launch in your web browser.
HTML is a way of marking up a page in a way which the browser can understand. The markup consists of tags denoted by left and right arrows around defined words. Tags come in pairs generally; a start tag and an end tag. Code 1 shows the minimal markup to form a web page.
	<!DOCTYPE html>
	<html>
		<head>
			<meta charset="utf-8">
			<title>Web Page Minimum</title>
		</head>
		<body>
		</body>
	</html>
So, what is happening here? And, didn't I say the tags come in pairs? What is the extra stuff in the meta tag? These are all good questions. Let's explore.
The first line is not an HTML tag. Rather, this line is a statement to the browser identifying the type of document. The most recent version of HTML is 5 and the doctype value is simple html. The doctype values are much wordier in earlier versions of HTML. There is also a variant XHTML type of HTML. XHTML is not in the itinerary for this tour, and we will only be exploring the current version. Just be aware you may see older HTML in your future travels, and some things you may do differently in today's HTML than in older HTML.
Next up is the html tag. The starting tag is on the second line. The ending tag is on the last line. The difference between the two tags is the forward slash in the ending tag just before the tag name of HTML. You may wonder why we declare a HTML tag. After all, we are creating a HTML document. Well, we can also include JavaScript in our HTML and we mark the JavaScript part of the file with a <script> tag. We will explore JavaScript in a future segment of our tour. For now, all we need to know is we need to put our HTML code inside of <html> tags.
The first thing to appear inside the <html> tag is the <head> tag. This section allows us to describe the web page. We still have not got to a point where we would code what we see on a web page, but we are getting there.
The <meta> tag is the firt stop in the <head> tag. Meta offers descriptions about web page. There can be multiple <meta> tags each of which provide a different type of information. The example here includes an attribute called charset and we set the value to utf-8.
The charset states the character set in use for the web page. The character set assigns a number to each character or symbol you see on screen. There are a few different character sets including the familiar ASCII.
Every html element (tag) can have an attribute. Attributes provide additional information about the element. There are some attributes common to all elements, and other attributes specific to other elements. In all cases, we provide the attribute name and set it equal to a value in quotes. We will explore more attributes as we continue our tour.
The title element provides a title for the web page. Hover over the tab for this page in your browser. You will see the text "A Learning Journey in Software Development." You will also see this same text if you hover over the icon for your browser. This value appears because it is the title value in the HTML for this web page.
Finally, we arrive at the body element. The body is where we insert the HTML code to display on the web page and which will be visible when you view it. Note there is nothing inside the body tags. What do you think will appear if we view this code in a browser? If you guessed nothing, you are correct. You will see a blank screen because we have not said what to show. Try it out.
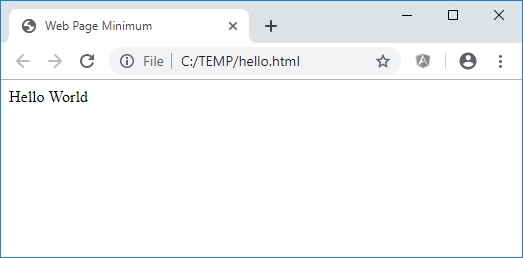
The obligatory first stop in a tour of any new language is getting it to say "Hello World" to you. This small milestone means you have everything set up correctly.
Remember that I said the page contents go in the body element. Start by making a copy of our previous basic.html file and save the file with hello.html as the file name. Between the start and end tags of the body element, enter Hello World and save the file. You can change the title if you want, but the change is not necessary. Now, open the file in your browser. If your browser view looks like Figure 1, then you have succeeded in creating your first web page.
	<!DOCTYPE html>
	<html>
		<head>
			<meta charset="utf-8">
			<title>Hello World Example</title>
		</head>
		<body>
			Hello World
		</body>
	</html>
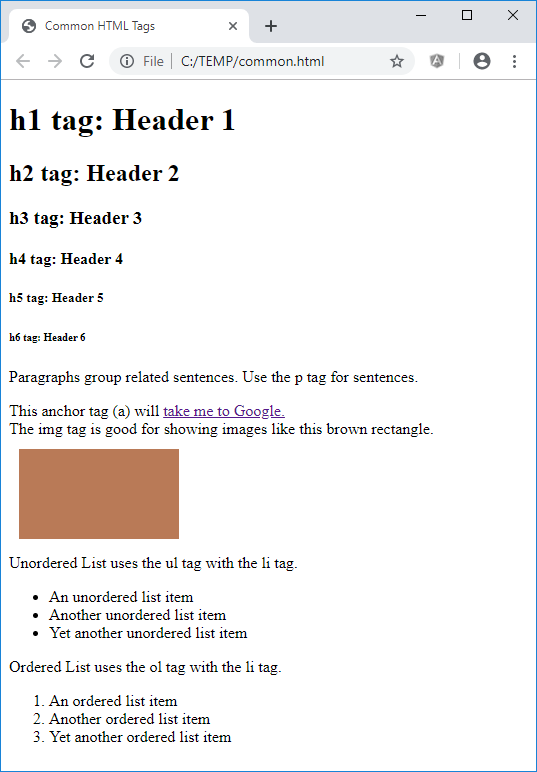
Code 3 shows some commonly used tags. Figure 2 shows how this code appears in a browser.
	<!DOCTYPE html>
	<html>
		<head>
			<meta charset="utf-8">
			<title>Common HTML Tags</title>
		</head>
		<body>
			<!-- Here is a comment. -->
			<div>
				<h1>h1 tag: Header 1</h1>
				<h2>h2 tag: Header 2</h2>
				<h3>h3 tag: Header 3</h3>
				<h4>h4 tag: Header 4</h4>
				<h5>h5 tag: Header 5</h5>
				<h6>h6 tag: Header 6</h6>
			</div>
			<div>
				<p>
					Paragraphs group related sentences. Use the p tag for sentences.
				</p>
			</div>
			<div>
				This anchor tag (a) will <a href="https://www.google.com/">take me to Google.</a>
			</div>
			<div>
				<div>The img tag is good for showing images like this brown rectangle.</div>
				<img src="./brownrect.png" alt="brown rectangle">
			</div>
			<div>
				Unordered List uses the ul tag with the li tag.
				<ul>
					<li>An unordered list item</li>
					<li>Another unordered list item</li>
					<li>Yet another unordered list item</li>
				</ul>
			</div>
			<div>
				Ordered List uses the ol tag with the li tag.
				<ol>
					<li>An ordered list item</li>
					<li>Another ordered list item</li>
					<li>Yet another ordered list item</li>
				</ol>
			</div>
		</body>
	</html>
All the exciting stuff happens within the body element. Despite this statement, the very first thing we encounter within the body tags in Code 3 is not that exciting at all, at least from a visual perspective.
The first item is a comment. Comments are important to remind yourself and to tell others information about the code and explain why you did something the way you did. The comments are only visible in the HTML code and never appear on screen. Although comments are not necessary, they are helpful. All comments start with a <!-- tag and end with a --> tag. The format is different than other tags we have seen, and, yes, we do need both dashes at the start and end. Your actual comments go in the middle. Comments can run for multiple lines. Just put the start tag where your comments begin and the end tag where your comments end. You could use the comment tags to comment out HTML code as well. Maybe you have some HTML which you want to keep in the file, but not show right now. Place comment tags around the HTML and the browser will ignore the code until you remove the comment tags.
As we look further down the code, we see several div elements. These div elements are divisions, or sections, where we can group related things together. Again, the div element is non-visual. You might want to have a div element to contain fields to show address information, or another to contain a list of places where you have worked and their locations.
The first div element we see contains six header tags noted by h1, h2, h3, h4, h5, h6. There are only six header tags. Header tags are an example of where the tag has a noticeable effect on what we see. The h1 tag, like the masthead on a newspaper, is the biggest. The h6 tag is the smallest. The bigger the header, the more prevalence is related to the information within it. Keep this fact in mind as search engines will rate the information near a h1 tag as more important than information in a h2 tag, and so on down to the h6 tag.
We encounter the p tag next. Think of the p tag as a paragraph. We can include paragraphs and text within the p element.
The anchor tag is next. Here we use a for anchor. The anchor tag contains a href attribute. This attribute only applies to a select few tags. The href attribute puts the hyper in HyperText Markup Language by serving as a launching point to go to another web page or document. The text between the starting and ending tag also has special formatting to indicate it is a link: different color for the different text, underlined text, text color change if you have not clicked a link or if you have clicked the link. In our example, clicking anywhere on the "take me to Google" text will load the Google home page into the browser. Changing the value of the href attribute changes where you will go. Try substituting other web site address to experiment.
Our next div element bring us to the img tag. There are a couple of special notes here. First, notice there is a starting img (for image) tag but no ending tag. I did not make a mistake. The img tag does not have an ending tag. We could include one, but it is necessary and might even present a problem in some browsers if you do. The basic reason for no ending tag is that the img tag shows only images, no text. Since there is no text, there is no reason to indicate where text will end.
The next thing to notice about the img tag is the src (for source) attribute. This attribute says what the source of the image is. In other words, the src is where would the page find the image file. In our example, we can find the image at "./brownrect.png". The ./ means the image is in the same folder as our HTML file. The remainder is the name of the file. We are using an image of type file type png here, but we could use other image types as well including: gif and jpeg file types.
The final thing to notice about our img tag is the alt (for alternate) attribute. This attribute contains a short description of the image. This alternative text shows if the image file was missing or was unavailable to the browser, a small x would appear on the screen. The value of the alt attribute would appear next to the x and explain what the user would normally see there. Some text explanation is better than a weird x symbol appearing. Also, the value of the alt attribute is helpful to visually impaired users who visit your web page. These users could be using the screen reader accessibility tool and this tool will use the alt value to tell your visitor what is there.
The final two div elements contain lists: an unordered list (ul tag), and an ordered list (ol tag). Both lists contain list items (li tag). The default marker for each list item in an unordered list is a black bullet. The default marker for each list item in an unordered list is a number starting with 1. There are attributes to change these default values, but we can explore these options at another time.
One of the goals of HTML5 is to make web pages more semantic, or, more simply, more meaningful. The visitor to your web page may not notice or care, but more meaningful tags will help the internet be easier to rate information on a page and to find related information across the entire web.
Think of a daily newspaper. There is the front-page main banner at the top of the page. There is an index of where to find certain topics such as weather, comics, obituaries, letters to the editor, and more. There are several articles. Some articles may have some ancillary information like a short biography of the reporter, or information about the article's topic which provides background about the subject not necessarily related to the main topic of the article. At the bottom of the page, there may be a copyright and information about the newspaper publisher. Some of these items would repeat for each section (national news, local news, sports, living) of the paper.
Using the markup we have visited so far, we would probably create a div element for the banner, another for index, a div for each article, ancillary information, and publisher. We might even nest the div elements where there would be a div element for each section of the paper. This technique would not really give a good understanding of how these div elements relate to one another, and would be difficult to find what is important to you. HTML5 introduces some new tags to help with organize these relationships.
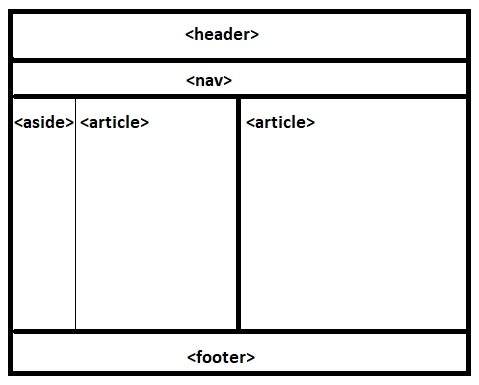
Figure 3 shows the relationship between some of the new tags in HTML5. This example could be a prototype of Page One of our previous newspaper. The header tag would be the banner, or mast head. The nav (for navigation) would be the index. Each article would be nested in an article element. The ancillary information (reporter bio, related article information, ...) would be in the aside element which could be in the article element. The publisher information could go in the footer element. This whole page might go in a section element (not shown). We could have section elements for the national news section, local news section, sports section, and so on. Each of these section elements would contain article elements for each article in the section. As you can see, these tags describe the relationship between each other better than using div and p tags.
We have seen a lot in this tour and experienced a good general feel of building a web page. Unfortunately, we were not able to cover everything. I hope you have seen enough and want to learn more. If so, then I recommend the following sources to explore more.
- W3C lists the official HTML standards and is the official word on how to implement and use HTML.
- HTML Reference lists all HTML tags and how to use them. Each tag lists applicable attributes, and gives examples of use.
- W3 Schools lists HTML tags. A benefit here is the Try It functionality which lets you modify the examples and see the result of the change. Although there is some disagreement on W3 Schools being true to official standards, I find the Try It examples helpful in providing immediate feedback when you are learning something new.
I think one thing you might have noticed is that the HTML is plain and not pleasantly arranged. Further, the web pages are not responsive to user interaction. For a look at how to style your HTML, please take the CSS Tour. For more about page interaction, please take the JavaScript Tour.